Black & White Photography Tips

Black & white photography is a subtle art that demands great attention to lighting, textures, tones and composition. Black and white images have the ability to convey simple, raw emotions of people, landscapes and other subject matter in a striking way. Here are five tips; you need to know when it comes to black and white photography.

Shoot in Raw – If your camera supports raw format, shoot in Raw. Shooting in raw gives, you more control over the image in the postproduction. It will open up many new possibilities and provides you enough flexibility to make any alteration in the image’s appearance and quality.

Shoot at your lowest ISO setting – When it comes to black & white photography use the lowest possible ISO setting. On the contrary, if you use high ISO the noise will become more apparent in shots, and your picture will not be as smooth as you expected. Therefore, use lowest ISO for black & white photographs and it is best to add grainy look during the postproduction.Image
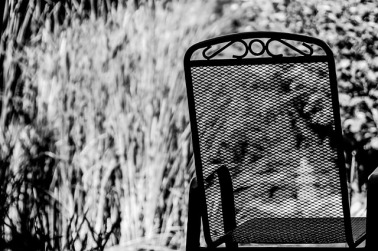
Use of Contrast- The improved contrast adds interest to the images. You can use light to your advantage, to bring great contrast. For instance- if you use side lighting, you will get longer shadows. As you cannot use color, contrast will bring the tonal differences in your photographs and make them stand out.

Look for Pattern and textures – In black & white photography; you cannot play around with colors, so look for tones, textures and shapes in your frame as points of interest. By, emphasizing on the patterns & rich textures, your photographs will become clear,compelling and exciting.

Look for wide range of grays – The photos will appear dull, if it does not have varying tones of gray. For achieving this, flash is your best bet. You can use flash to throw highlights and shadows over certain areas of your photo
Quick & Easy Landscape Photography Tips

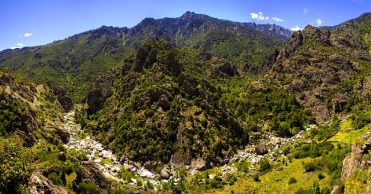
Landscape Photography captures beauty of nature at its best like majestic mountains; rushing river, and stunning sunrise. Nature is awe-inspiring and there is wealth of natural landscapes filled with absolute beauty, one should have the passion and technique to take great landscape photos. Follow these photography tips and get set for capturing some impressive clicks.

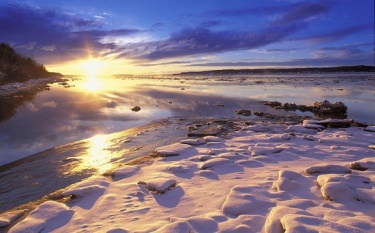
The Golden Hour – Lighting is the soul of photography. Quality lighting is the most influential attribute of a beautiful landscape. The best time during the day is early morning at the very first instance of daylight in the morning or late afternoon when sun is lower, less contrasty, and often displays a subtle color palette.

Landscape Photography
Depth of field – When you are taking a landscape photograph, try creating a sense of depth, this can be achieved by keeping a small aperture setting. Select a small aperture such as f16-f20 as the smaller your aperture the greater the depth of field in your shots. This makes your image sharp throughout the scene, the objects in the foreground and background gets equally sharp.

Use wide- angle Lens – People often tend to buy most expensive camera but often overlook importance of lens. A top quality lens dramatically improves your image quality. Wide- angle lens is most preferred for landscape photography as it gives broader view and tends to give a greater depth of field.

Composition Composition is the key to successful landscape photography. Simple apply Rule of Thirds, divide your frame into imaginary four lines on both the horizontal and vertical axis. Now simply place areas of interest at the points at which the lines intersect. Images captured with this rule give harmonious composition and viewers can figure our focal point without their eye wandering.

landscape
Use Photographic Filters – For landscape photography, polarising filters are the most preferred choice. These filters eliminate reflections and harsh glares and give better color intensity especially when shooting in sunny weather it gives bluer skies, greener foliage etc.

Landscape photography allows you to be one with nature and is most loved form of photography. From professional photographers on the go, to advanced amateurs to hobbyist, all desire to capture astonishing landscapes depicting beauty and serenity of nature. As the saying goes, practice makes a man perfect; with right skill and knowledge of equipment, you can yourself capture breath-taking shots.

Amazing Ways to Take Beautiful Pictures from an Airplane Window

Taking pictures from the airplane window is an awesome experience. You get to see our beautiful planet clearly amongst the flying in the clouds. Photographing such an awesome experience is worth taking the pain but shooting from an airplane is not an easy job. Here are some helpful tips that will you must follow in order to capture stunning pictures of the earth from the airplane window.

Choose the most appropriate seat
Book the front side window seat. If you book the seat near the wings, you won’t be able to take most of the view, as the wings will cover the most of the frame. The back side of the plane is very bumpy, so avoid back seats as well. Book your seat in advance and always prefer a window seat, so that you don’t have to ask other passengers for favors.

Image from airplane window
Keep your camera ready
Ready steady go! Set the speed of you camera shutter around 500 of a second. Set the ASA to around 250 to 400to avoid blurred pictures. Take your camera near the window and position yourself properly so that you can be comfortable while shooting. Always be ready, as the plane moves faster than your imagination and if you aren’t ready to shoot, you will miss the shot.

Avoid using a flash
Using a flash will bounce the light from the airplane window glass and reflect it towards your camera. This will destroy the quality of your photos.

Shoot early
Once the plane reaches a certain height, window panes will get iced up reducing the amount of light that enters your camera sensor. Therefore, start shooting as soon as the plane takes off.

The camera should not touch the windows
This is because; the vibration of the plane will blur your shots and decrease their sharpness and overall quality. Position yourself close to the window but make sure there is no contact between the camera and the plane.


Post production is important
Shooting from a moving plane will not be easy and the quality of pictures is not going to be absolutely perfect. You will have to adjust the contrast level, saturation, etc. during the post production. Although this is a time consuming process, post production is extremely necessary for airplane photography.

Apart from technical issues, you will also face many other factors that will make it difficult for you to shoot inside an airplane. Your co-passenger may object to the disturbance that you might create. Balancing your camera and holding it safely in a moving plane will be difficult for you. If you love aerial photography, be prepared to face these issues.

Chroma Keying Techniques for Making Stunning Videos

This era of advanced technologies had left everyone demanding for more. This holds true for the photography profession as well. Unless you don’t give some magical taste to your work, your videos and photos sound simple and unappealing. Whether you want to recreate the past or present a fantasy word of the future, you have to use cutting-edge technologies to give a realistic look to your work. Out of all, Chroma keying is one such technology that is in demand these days. Although this technology is very simple, it requires you to be very precise in order to achieve results that look real. Here are some of the tips will help you achieve perfect Chroma keying results.

  • The most important part of making a video is to decide the flow of the video. Before you start shooting, imagine what you want to show. Imagination always helps to set up a frame, so you must first visualize what you want to have in your video and work accordingly. A well-built and thoughtfully created frame will help you arrange other elements such as the color, sound, brightness, etc, thereby providing reality to your work.

  • Green and Chroma green are different. Not all shades of color are equally effective for Chroma keying. So it is very important that the color of your Chroma key apparels and accessories should be Chroma key green.

Image

  • There shouldn’t be any color spills inside your frame. To avoid color spills, it is important that your subject should stand at a distance of at least 6 to 10 feet from the green screen background. The farer the subject, the clearer would be the final picture or video. This is because, maintaining a significant distance will reduce the reflections from the background, thereby reducing color spills.

  • While shooting, there should not be any shadow visible on the set. Both the subject and the background should be evenly lit. Presence of any shadow can spoil the video. This is because, when there will be shadow Chroma keying will not work properly leaving patches of green, thereby making your video look tampered.

  • Do not have anything in green in the scene except the Chroma key apparels and accessories or else it will be keyed out. If you want something in green that is unavoidable, such as a lemon floating in the air and turning green, use blue accessories and backdrop. Blue is equally effective as green but since it is more common than green, people prefer using green.

  • Use genuine software to edit and give final touch to your video. Many software offer instant green screen removal along with a few attractive background images and scenes. One such reliable software is 123 video magic.

    These Chroma key photography tips are useful for beginners as well as professional photographers. Chroma keying has immense potential, just use it in the correct way.